My sister asked me if I could make her a “Taco Tray”. I said absolutely!! Whenever I visit her I never leave empty handed. Whether is veggies from her garden or plants or homemade salve for my arthritis, she’s always helping me out:)
It was her birthday a few days ago so I gifted her this tray, (she said she liked it) 🙂
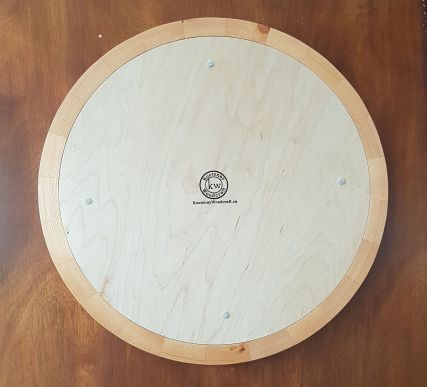
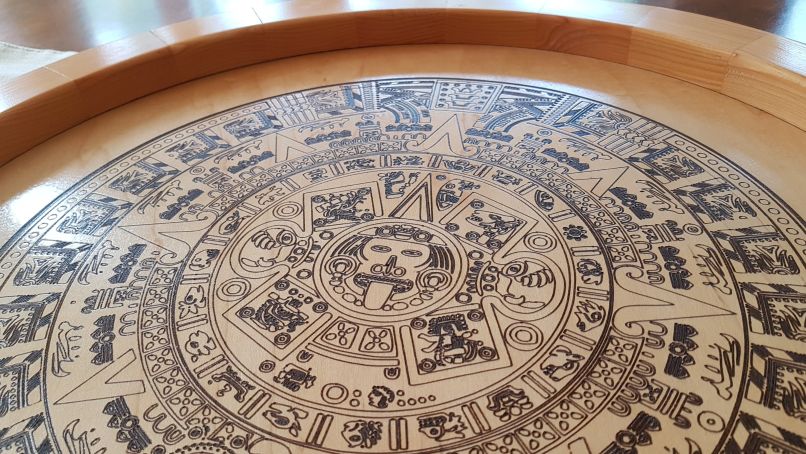
When she first asked if I could make one for her, she sent me this picture as an example of what she was looking for

My first thought was to laminate 3 or 4 2×6’s together then rout out the recess with my CNC. This seemed like a lot of work for the cnc and I thought there has to be a better way.
There’s a guy I work with (Gary), who does beautiful wood turning and he sometimes makes segmented rings out of small pieces of scrap wood then laminates these rings together to make a segmented bowl blank which he then turns on his lathe to create the bowl. I thought one large segmented ring might be the answer to my dilemma.
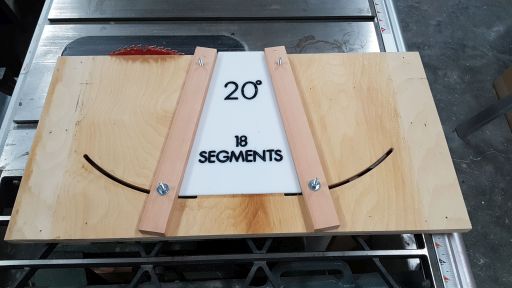
I picked Gary’s brain to find out how he makes his rings. Turns out, he made a “Wedgie Sled” jig that he uses on his table saw to cut the individual segments for the ring. Gary sent me some pictures of his jig then I watched a few YouTube videos and made myself a jig…it works great!! (I used a 24 segment template rather than the 18 shown…I made a few different ones)
I would have liked to make the tray bigger but as I wanted to laser burn the Aztec calendar on the surface of the tray, I was limited to how big I could make it due to the size of my laser bed. I ended up with a tray that’s 22″ across. Not bad I guess.
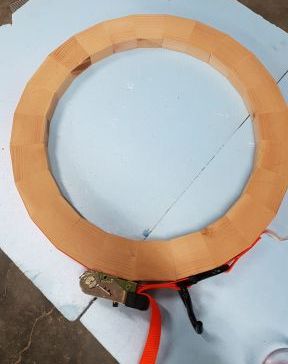
I started with the ring.
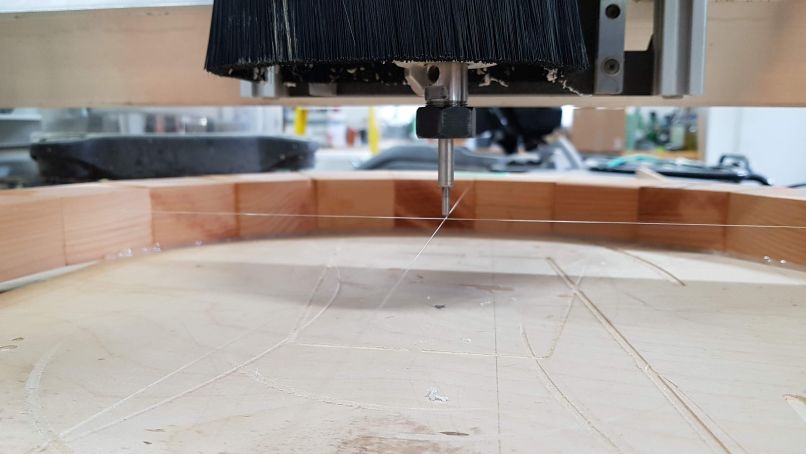
After hot gluing the ring to a piece of plywood that was clamped to my cnc table, (glued on the inside only so I could face the ring, cut out the recess for the plywood and profile the outside edge), I first faced the ring:
After those 3 steps were complete, I hot glued the outside of the ring to the plywood so I could release the inside.
The next step was cutting the plywood base for the base. This process wasn’t as smooth as the ring. When cutting the first base, my router assembly hung up on a collet wrench I had left too close to the side rails and threw my router off course.
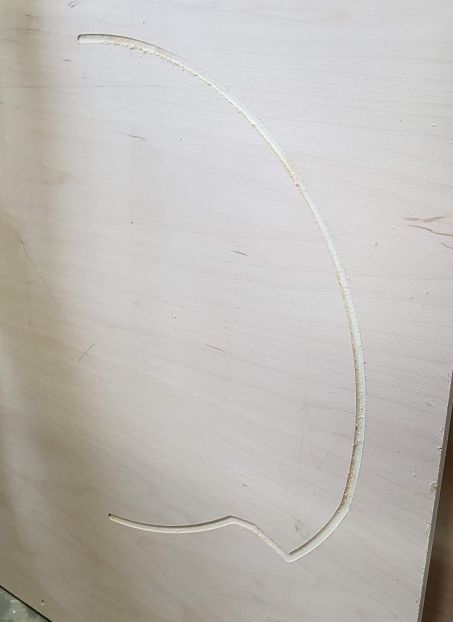
I cut the second one out without incident…thankfully as one sheet of 3/8 maple plywood was $100!!
The laser burning took about 90 minutes. There were a couple of screw ups there too when my exhaust hose that’s attached to the laser unit got caught on one of the side rails and threw it off course. No pics of that incident. I guess I was too pissed off after the CNC debacle:)
The end result was pretty nice:) Now that I’ve got the segmented ring jig, I’m going to try a few more projects using it.
Oh ya, I contemplated attaching a lazy susan base so the tray could spin freely on the table. I instead added 4 felt pads to the bottom of the tray and it slid around pretty well. I didn’t want to bulk the tray up any more than it was already.